internet へ web 公開する場合、セキュリティを考慮すると、最新のものを使うことが望ましいと考えます。
2013/1/13時点の Nginx の最新版(mainline)は、1.13.8 になっていますので、ソースパッケージからビルドして Deb パッケージを作成し、導入する手順を記載します。
1. 事前確認
Nginx の公式サイトで、最新版(mainline)の版数を確認します。
次に、Raspbian stretch のデフォルトパッケージリポジトリを使用して、インストールできる Nginx の版数を確認します。
※ 版数の確認結果が、同じであれば apt-get install nginx するのみでOKです。
# apt-get update
# apt-cache policy nginx
nginx:
インストールされているバージョン: (なし)
候補:               1.10.3-1+deb9u1
バージョンテーブル:
1.10.3-1+deb9u1 500
500 http://mirrordirector.raspbian.org/raspbian stretch/main armhf Packages
2. 公式サイトのリポジトリ情報追加
Nginx 公式サイトの GPG 公開鍵を登録します。
# wget -O - http://nginx.org/keys/nginx_signing.key | apt-key add -
Nginx のリポジトリ情報を追加し、パッケージ・リストの更新を行います。
# echo "deb http://nginx.org/packages/mainline/debian/ stretch nginx" >> /etc/apt/sources.list.d/nginx.list
# echo "deb-src http://nginx.org/packages/mainline/debian/ stretch nginx" >> /etc/apt/sources.list.d/nginx.list
# apt-get update
3. 依存パッケージのインストール
Nginx ソースパッケージをビルドする際に、必要となる依存パッケージをインストールします。
# apt-get build-dep nginx
4. ソースパッケージをダウンロード
Nginx ソースパッケージのダウンロードディレクトリを作成し、そこに移動します。
# mkdir /usr/local/src/nginx
# chmod 777 /usr/local/src/nginx
# cd /usr/local/src/nginx
Nginx ソースパッケージをダウンロードします。
# apt-get source nginx
5. 追加モジュールの準備
※追加モジュールが必要ない場合は、次の項に進んで下さい。
ここでは、Proxy cacheを削除しやすくするための追加モジュール「ngx_cache_purge」の追加準備を行います。
まず、作業用のディレクトリを作成し、そこに移動します。
# mkdir /usr/local/src/ngx_cache_purge
# cd /usr/local/src/ngx_cache_purge
追加モジュール「ngx_cache_purge」をダウンロードし、展開します。
# wget http://labs.frickle.com/files/ngx_cache_purge-2.3.tar.gz
# tar -zxvf ngx_cache_purge-2.3.tar.gz
Nginx ソースパッケージのビルド時に、追加モジュールが組み込まれる様に、debian/rules ファイルを編集します。
(nginx-1.13.8の例)
# vi /usr/local/src/nginx/nginx-1.13.8/debian/rules
./configure 部分に下記を追記します。
「 –add-module=/usr/local/src/ngx_cache_purge/ngx_cache_purge-2.3 」
~~
config.status.nginx: config.env.nginx
        cd $(BUILDDIR_nginx) && \
        CFLAGS="" ./configure --prefix=/etc/nginx --sbin-path=/usr/sbin/nginx --modules-path=/usr/lib/nginx/modules --conf-path=/etc/nginx/nginx.conf --error-log-path=/var/log/nginx/error.log --http-log-path=/var/log/nginx/access.log --pid-path=/var/run/nginx.pid --lock-path=/var/run/nginx.lock --http-client-body-temp-path=/var/cache/nginx/client_temp --http-proxy-temp-path=/var/cache/nginx/proxy_temp --http-fastcgi-temp-path=/var/cache/nginx/fastcgi_temp --http-uwsgi-temp-path=/var/cache/nginx/uwsgi_temp --http-scgi-temp-path=/var/cache/nginx/scgi_temp --user=nginx --group=nginx --with-compat --with-file-aio --with-threads --with-http_addition_module --with-http_auth_request_module --with-http_dav_module --with-http_flv_module --with-http_gunzip_module --with-http_gzip_static_module --with-http_mp4_module --with-http_random_index_module --with-http_realip_module --with-http_secure_link_module --with-http_slice_module --with-http_ssl_module --with-http_stub_status_module --with-http_sub_module --with-http_v2_module --with-mail --with-mail_ssl_module --with-stream --with-stream_realip_module --with-stream_ssl_module --with-stream_ssl_preread_module --with-cc-opt="$(CFLAGS)" --with-ld-opt="$(LDFLAGS)" --add-module=/usr/local/src/ngx_cache_purge/ngx_cache_purge-2.3
        touch $@

config.status.nginx_debug: config.env.nginx_debug
        cd $(BUILDDIR_nginx_debug) && \
        CFLAGS="" ./configure --prefix=/etc/nginx --sbin-path=/usr/sbin/nginx --modules-path=/usr/lib/nginx/modules --conf-path=/etc/nginx/nginx.conf --error-log-path=/var/log/nginx/error.log --http-log-path=/var/log/nginx/access.log --pid-path=/var/run/nginx.pid --lock-path=/var/run/nginx.lock --http-client-body-temp-path=/var/cache/nginx/client_temp --http-proxy-temp-path=/var/cache/nginx/proxy_temp --http-fastcgi-temp-path=/var/cache/nginx/fastcgi_temp --http-uwsgi-temp-path=/var/cache/nginx/uwsgi_temp --http-scgi-temp-path=/var/cache/nginx/scgi_temp --user=nginx --group=nginx --with-compat --with-file-aio --with-threads --with-http_addition_module --with-http_auth_request_module --with-http_dav_module --with-http_flv_module --with-http_gunzip_module --with-http_gzip_static_module --with-http_mp4_module --with-http_random_index_module --with-http_realip_module --with-http_secure_link_module --with-http_slice_module --with-http_ssl_module --with-http_stub_status_module --with-http_sub_module --with-http_v2_module --with-mail --with-mail_ssl_module --with-stream --with-stream_realip_module --with-stream_ssl_module --with-stream_ssl_preread_module --with-cc-opt="$(CFLAGS)" --with-ld-opt="$(LDFLAGS)" --add-module=/usr/local/src/ngx_cache_purge/ngx_cache_purge-2.3 --with-debug
        touch $@
~~
6. ソースパッケージのビルド
Nginx ソースパッケージをビルドし、Debパッケージを作成します。
(nginx-1.13.8の例)
# cd /usr/local/src/nginx/nginx-1.13.8
# dpkg-buildpackage -uc -b
ビルドが終了すると、親ディレクトリにDebパッケージファイルが作成されます。
# cd ..
# ls
nginx-1.13.8                          nginx_1.13.8-1~stretch_armhf.buildinfo
nginx-dbg_1.13.8-1~stretch_armhf.deb  nginx_1.13.8-1~stretch_armhf.changes
nginx_1.13.8-1~stretch.debian.tar.xz  nginx_1.13.8-1~stretch_armhf.deb
nginx_1.13.8-1~stretch.dsc            nginx_1.13.8.orig.tar.gz
7. Debパッケージファイルのインストール
ここまでの手順で作成された、Nginx Debパッケージファイルをインストールします。
# dpkg -i nginx_1.13.8-1~stretch_armhf.deb
8. 確認
インストールされた、Nginx のバージョン、モジュールは下記コマンドにて確認出来ます。
# nginx -V
Nginx 起動状態の確認します。
(下記コマンドを実行し、「 Active: active (running) 」の表示があれば起動OKです。)
# systemctl status nginx
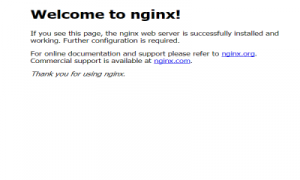
ブラウザから ip アドレス指定でアクセスし、下記の初期画面の表示を確認できればインストール完了です。


コメント